> For the complete documentation index, see [llms.txt](https://wiki.onfa.io/llms.txt). Markdown versions of documentation pages are available by appending `.md` to page URLs; this page is available as [Markdown](https://wiki.onfa.io/wallet/deposit-and-withdrawal/cryptocurrencies.md).
# Cryptocurrencies
Deposit/Withdrawal Guide
### **1. Withdrawal Instructions (Withdraw)**
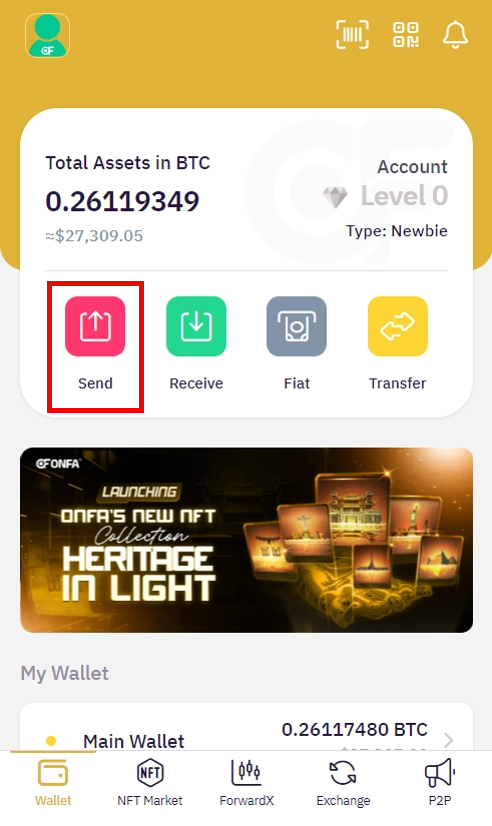
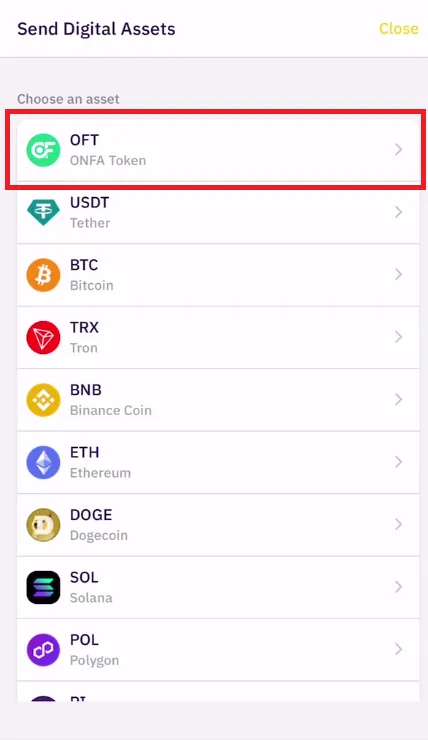
**Step 1: Select the asset to withdraw**
* Press the **"Send"** on the wallet interface\\
* Select the coin/token type from the supported list (USDT, BTC, ETH...)\\
**Step 2: Configure transaction information**
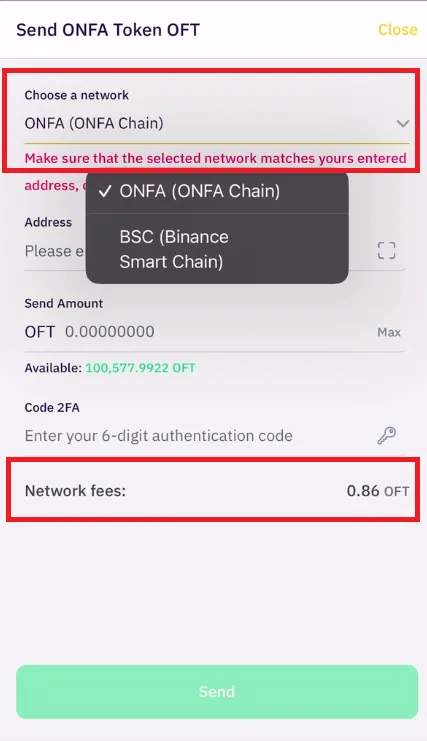
1. **Select the blockchain network** appropriate from the dropdown menu
* Note: Each network has its own gas fee displayed alongside. Gas fees are denominated in OFT.\\
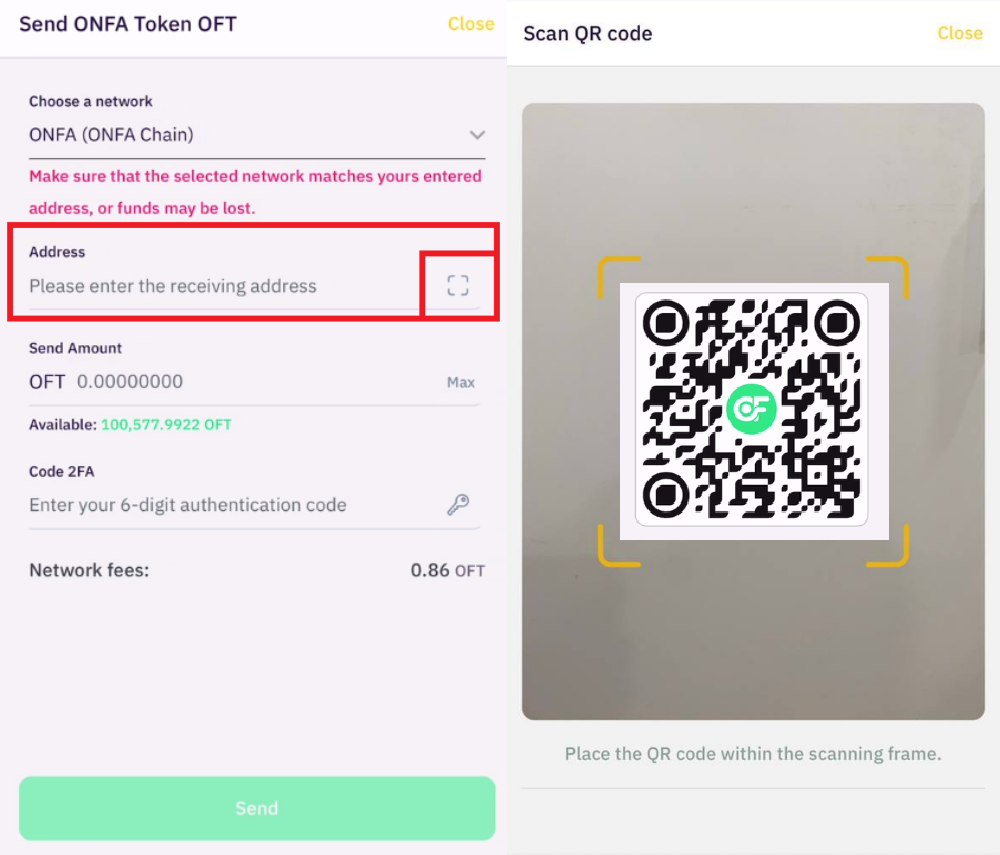
2. Enter precisely **the recipient wallet address** or:
* Use the **QR code scan** feature (if available)
> ⚠️ **Security notice:**
>
> * Ensure the selected network is compatible with the recipient wallet.
> * Transactions using the wrong network, wrong asset type, or incorrect address will result in permanent loss of assets.
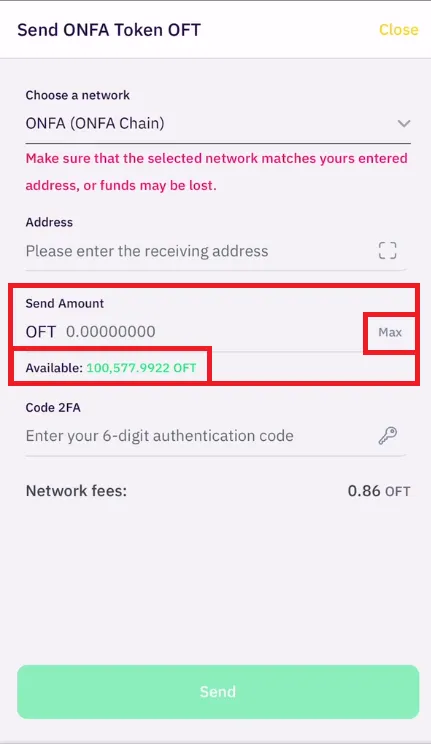
**Step 3: Enter the amount**
* Enter the amount to withdraw in the **"Send amount" field**
* Reference:
* **Available balance** is displayed below.
* The **"Max"** to use the full balance.\\
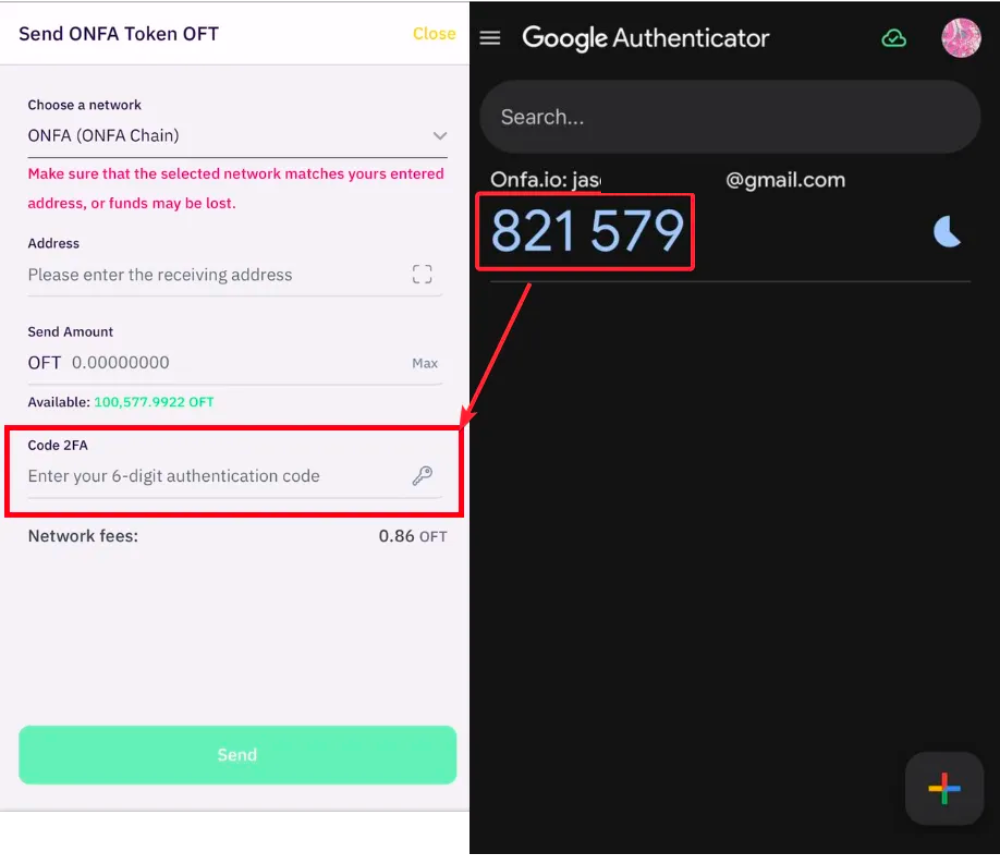
**Step 4: Security verification**
* Open the 2FA authenticator app (Google Authenticator/Authy)
* Enter the 6-digit code into the **"2FA Code" field**
**Step 5: Complete the transaction**
* Carefully review the information.
* Press **"Confirm Send"**
* The transaction will be processed and updated in the system
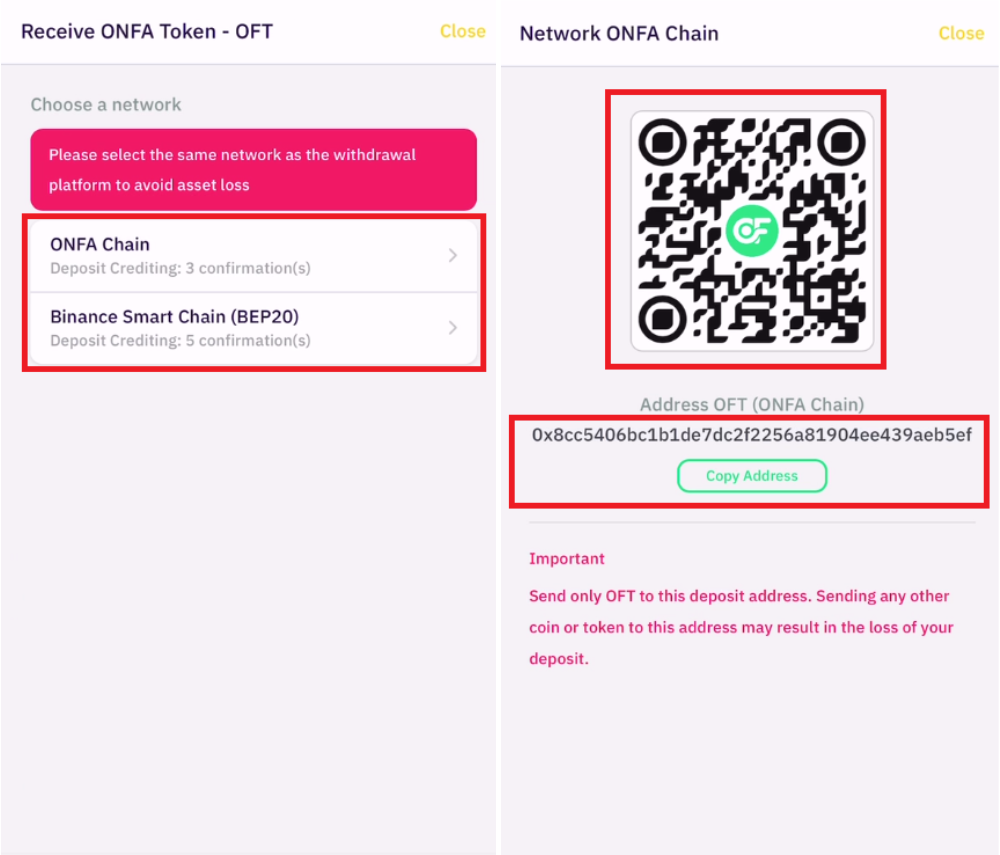
### **2. Deposit Instructions (Deposit)**
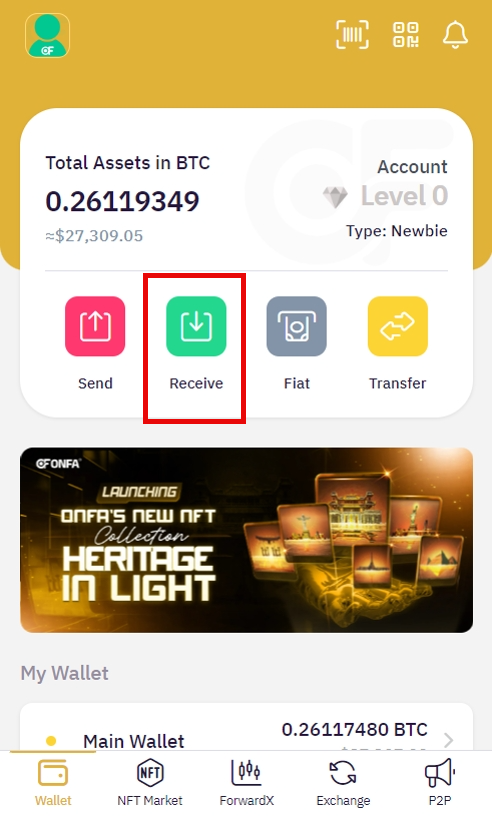
**Step 1: Select the asset to deposit**
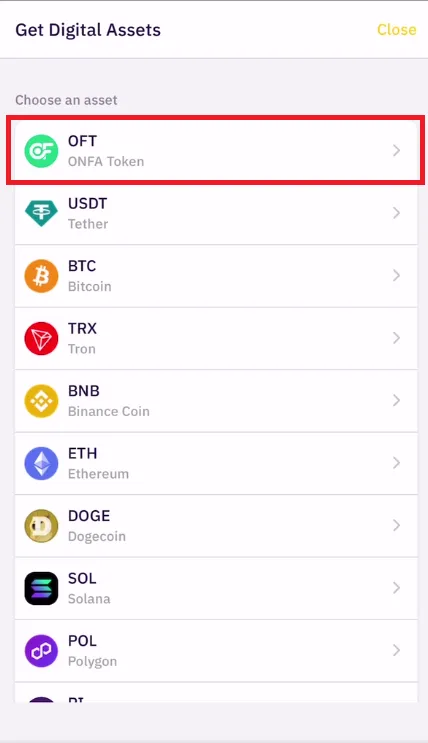
* Press the **"Receive"** on the wallet interface\\
* Select the coin/token from the supported list\\
**Step 2: Configure receiving information**
1. **Select the network** corresponding from the list.
2. The system will display:
* Your deposit wallet address.
* The corresponding QR code.
**Step 3: Execute the deposit.**
* Copy the address or scan the QR code to transfer funds from another wallet/platform.
* Carefully verify the selected network when performing the transaction.
> 🔔 **Important notes:**
>
> * Only transactions from the same selected network are accepted.
> * The balance will be automatically updated to **Wallet** after the blockchain system confirms.
---
# Agent Instructions
This documentation is published with GitBook. GitBook is the documentation platform designed so that both humans and AI agents can read, navigate, and reason over technical content effectively. Learn more at gitbook.com.
## Querying This Documentation
If you need additional information that is not directly available in this page, you can query the documentation dynamically by asking a question.
Perform an HTTP GET request on the current page URL with the `ask` query parameter, and the optional `goal` query parameter:
```
GET https://wiki.onfa.io/wallet/deposit-and-withdrawal/cryptocurrencies.md?ask=&goal=
```
`ask` is the immediate question: it should be specific, self-contained, and written in natural language.
`goal` is optional and describes the broader end goal you are ultimately trying to accomplish on behalf of the user. GitBook uses it to tailor the answer towards what is most useful for that goal.
The response will contain a direct answer to the question and relevant excerpts and sources from the documentation.
Use this mechanism when the answer is not explicitly present in the current page, you need clarification or additional context, or you want to retrieve related documentation sections.